In Windows 7/8/10 you can display all your photographs by tags. Every tag that you’ve ever attached to a photograph will show up as it’s own folder, and opening that folder will display all of your photographs with that specific tag.
Once you’ve properly tagged your photographs, it will be trivial to find every image you ever took of your cat, your car, or your kids wearing those shoes you thought were so cute that they deserved a tag of their own.
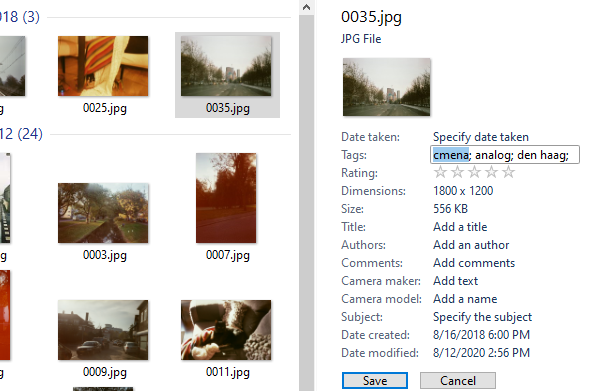
1. Open a folder with your photographs, and first make sure the Details pane is active. At the top of your explorer window, click “View” and select “Details pane”.
2. Select one image or multiple images and type your tag in the “Details pane” at “Tags”. You can add multiple tags by using a comma. Press enter to confirm. You can edit the tags later.
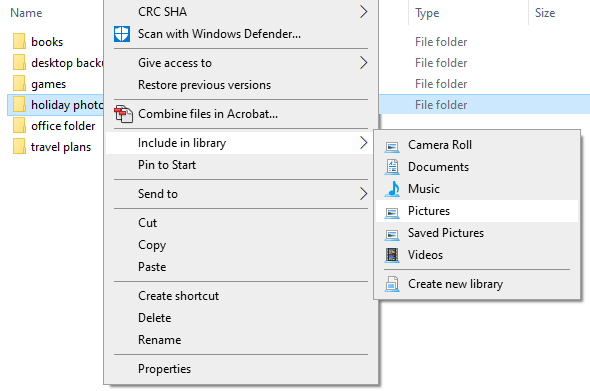
1. Right click on a folder with photographs, and select “Include in library” and then “Pictures”. You can add more then one folder.
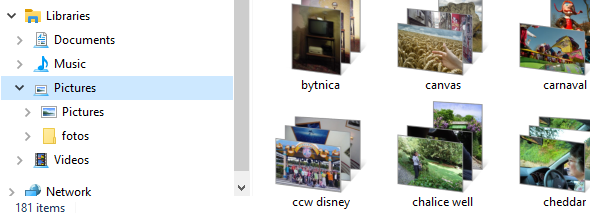
2. Find the “Libraries” folder in the left hand bar in your explorer window and select Pictures
3. Right click anywhere in your Library Pictures folder and select “Arrange by” and then choose “Tag”.